Power your Customer Experience Using the Webex Click-To-Call Feature!
December 19, 2024

Traditional Business to Consumer (B2C) focused enterprises often have difficulty maintaining seamless and simple customer support. Most enterprises usually require users to register accounts or manually dial support numbers. These methods add significant friction for regular consumers, thereby affecting the quality of the support. As a result, many of them experience reduced consumer conversion rates.
Enter Click-to-Call, a feature provided by Webex through the Web Calling SDK, which allows enterprises to empower users to connect with customer support at the click of a button, significantly boosting the customer experience.
Check Out Our Vidcast Demo
For a quick video demo of click to call, see:
An Example Problem Scenario
Consider the scenario of a company that owns a travel bookings website called ‘Plan My Trip,’ which allows users to book hotels or flights. The website hosts many visitors, often amounting to over 10,000 a day. Users can browse the various products available and make a purchase.
However, Plan My Trip faces a problem with their sales support. For any user who has decided to book a trip, they find it very hard to contact the appropriate agent. Most of the times, they would have to manually dial reference numbers spread across the website. This entire process adds significant friction for first-time users, thereby reducing conversion rates considerably.
The company has taken note of this problem, and the leadership has decided to revamp their customer support by making it an easy and seamless process for users to obtain sales support. In order to achieve their objectives, they can decide to use the Webex Click-to-call feature.
Set up Click-to-call
Let’s say you are a frontend developer for the Plan My Trip website, as Webex Click-to-call is currently in beta, here’s you can set up the prerequisites:
- Begin by visiting the Webex Click-to-Call Beta page and register for the beta.
- Once you have access to the beta, proceed to setup all the prerequisites, as mentioned in the beta document.
Retrieve the Required Tokens
Next, you need to retrieve the appropriate authorization tokens and extension numbers:
- You must then proceed to the Webex Developer Portal and obtain the Service App access token and a user bearer token, which will be used for authentication.
- Login to your respective admin account in Webex Control Hub and copy the extension number of the Hunt Group or Call Queue that has been created.
Implement Click-to-Call
Once all the prerequisites are finished, you can then integrate the click to call feature to their website via the Calling SDK. The language you will be writing the code to consume the SDK would be JavaScript. Here’s how you can do it:
Step 1 (Getting the Package)
Using a package manager such as yarnor npm, install the Webex calling package using npm or yarn:
npm install @webex/calling
or
yarn add @webex/calling
or
Using CDN, you can access it directly from within the browser:
<script src="https://unpkg.com/webex/umd/calling.min.js"></script>
Step 2 (Create the Code Setup)
Use the following information and create the calling object within your code.
- By following the instructions in the beta document, you need to generate your guest token and JWE token.
- Using the references provided in the beta document, you can generate both the Webex configurations and the calling configurations.
Step 3 (Set up the Call in Code)
Using the created calling object, add the calling logic to your code:
calling.on('ready', () => {
  calling.register().then(async () => {
    callingClient = window.callingClient = calling.callingClient;

    const localAudioStream = await Calling.createMicrophoneStream({audio: true});
    const line = Object.values(callingClient.getLines())[0];

    line.on('registered', (lineInfo) => {
      // Create call object
      const call = line.makeCall();

      // Trigger an outbound call
      call.dial(localAudioStream);
    });
    line.register();
  });
});
Results
Using the capabilities of the click-to-call feature, the Plan My Trip website should look something like this:
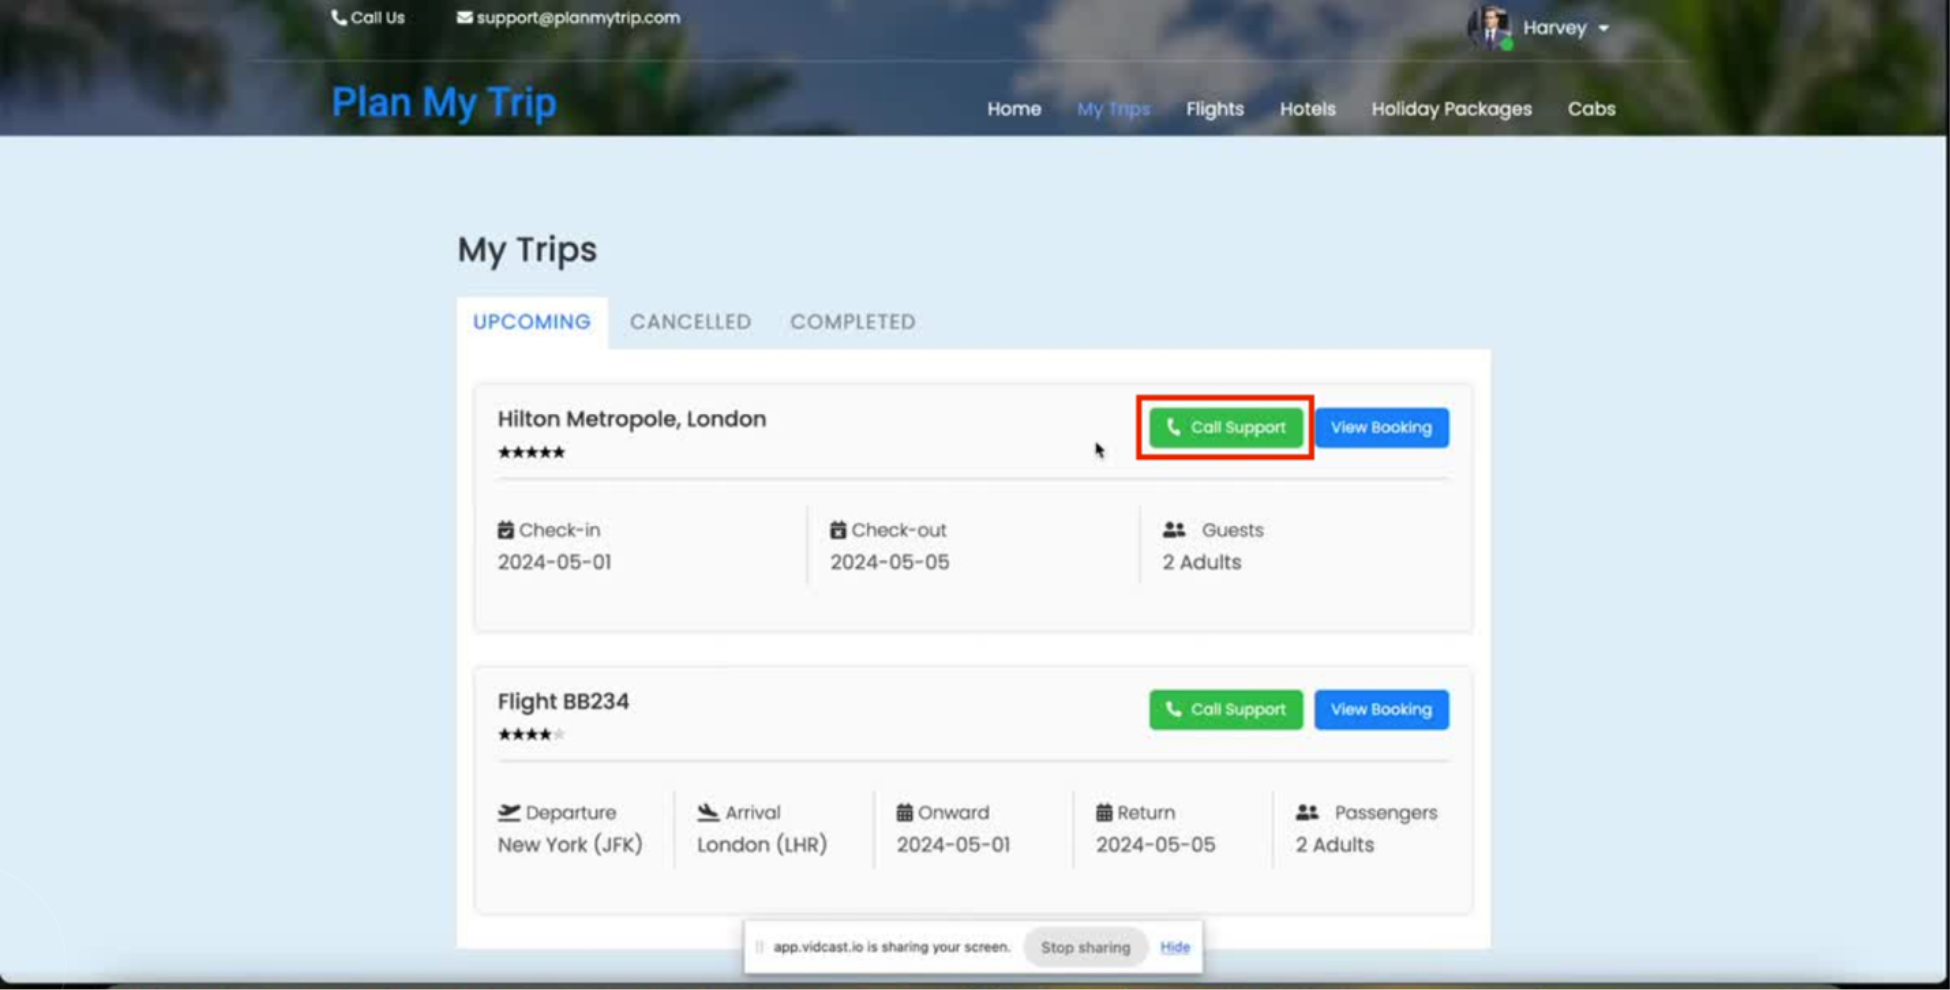
The Call Support button is linked to the click-to-call flow and allows users to directly reach out to support.
Conclusion
Using the power of the Webex Click-to-call feature, companies (just like our organization, Plan My Trip) can easily integrate the one click calling feature into their website, thereby boosting their customer support.
Need Some More Help?
For any further questions or assistance, contact the Webex Developer Support team. Conversations can also be started or joined at the Webex Developer Community site. Happy coding!