DocumentationBlogSupport
Log inSign up
Log inSign up
BlogSupport
Build
Getting StartedPlatform Introduction
Embedded Apps
What's NewOverviewDeveloper GuideSidebar API Quick StartSubmission Checklist for Embedded Apps
Design Guidelines
MessagingMeetingsDevicesSidebarSidebar on Mobile
API Reference
BotsButtons and CardsIntegrationsBYODSService AppsService App GuestsService Apps G2GGuest IssuerWidgetsWebex ConnectLogin with WebexInstant ConnectInstant Connect Meeting LinksDeveloper SandboxBeta ProgramSubmit Your AppSupport PolicyFAQs
APIs
API Behavior ChangesPartners API GuideXML API DeprecationAccess the APIREST API BasicsCompliance
Webex APIs
Reference
Data Sources
Admin
OverviewAdmin APIsHybrid ServicesAuthentication
Guides
Hybrid ServicesWebhooksReal-time File DLP BasicsProvisioning APIsBackground ImagesAudit Events Error Reference
Reference
Admin Audit EventsAuthorizationsEventsGroupsHistorical AnalyticsHybrid ClustersHybrid ConnectorsLicensesMeeting QualitiesOrganization ContactsOrganizationsPartner ManagementPartner Reports/TemplatesPartner TagsPeopleRecording ReportRecordingsReport TemplatesReportsResource Group MembershipsResource GroupsRolesSecurity Audit EventsSession TypesSettingsSpace ClassificationsTracking CodesWorkspace LocationsWorkspace Metrics
Webex Calling Beta
Overview
Guides
Integrations and AuthorizationMetadata and Samples
Webex Calling
OverviewSDKs and ToolsWhat's New
Guides
Integrations and AuthorizationProvisioning APIsMetadata and SamplesBackground Images
Reference
Call ControlsCall RoutingCall Settings For MeCalling Service SettingsClient Call SettingsConference ControlsConverged RecordingsDECT Devices SettingsDevice Call SettingsDevicesEmergency Services SettingsFeatures: Announcement PlaylistFeatures: Announcement RepositoryFeatures: Auto AttendantFeatures: Call ParkFeatures: Call PickupFeatures: Call QueueFeatures: Call RecordingFeatures: Customer Experience EssentialsFeatures: Hunt GroupFeatures: Operating ModesFeatures: Paging GroupFeatures: Single Number ReachLocation Call SettingsLocation Call Settings: Call HandlingLocation Call Settings: SchedulesLocation Call Settings: VoicemailLocationsNumbersPSTNPartner Reports/TemplatesPeopleRecording ReportReportsReports: Detailed Call HistorySend Activation EmailUser Call SettingsVirtual Line Call SettingsWorkspace Call SettingsWorkspaces
Webex for Broadworks
Overview
Guides
Integrations and AuthorizationDeveloper's Guide
Reference
BroadWorks Billing ReportsBroadWorks EnterprisesBroadWorks SubscribersBroadWorks Workspaces
Webex for Wholesale
Overview
Guides
Developer's Guide
Reference
Wholesale Billing ReportsWholesale Provisioning
Webex for UCM
Guides
Integrations and Authorization
Reference
UCM Profile
Contact Center
Overview
Reference
Data Sources
Customer Journey Data
Overview
Guides
Getting StartedFAQ
Devices
Overview
Guides
Devices
Reference
Device Call SettingsDevice ConfigurationsDevicesWorkspace LocationsWorkspace MetricsWorkspace PersonalizationWorkspacesxAPI
Directory Services
Reference
Domain ManagementIdentity Organization
Meetings
Overview
Guides
Integrations and AuthorizationWebhooksWebinar GuideMeeting Resource Guide
Reference
Meeting ChatsMeeting Closed CaptionsMeeting InviteesMeeting MessagesMeeting ParticipantsMeeting PollsMeeting PreferencesMeeting Q and AMeeting QualitiesMeeting TranscriptsMeetingsMeetings Summary ReportPeopleRecording ReportRecordingsSession TypesTracking CodesVideo MeshWebhooks
Messaging
Overview
Guides
BotsIntegrations and AuthorizationWebhooksButtons and Cards
Reference
Attachment ActionsEventsMembershipsMessagesPeopleRoom TabsRoomsTeam MembershipsTeamsWebhooks
SCIM 2
Overview
Reference
SCIM 2 BulkSCIM 2 GroupsSCIM 2 Users
Workspace Integrations
OverviewTechnical DetailsControl Hub Features
Webex Status API
Full API Reference
Admin Audit EventsAttachment ActionsAuthorizationsBroadWorks Billing ReportsBroadWorks EnterprisesBroadWorks SubscribersBroadWorks WorkspacesCall ControlsCall RoutingCall Settings For MeCalling Service SettingsClient Call SettingsConference ControlsConverged RecordingsDECT Devices SettingsData SourcesDevice Call SettingsDevice ConfigurationsDevicesDomain ManagementEmergency Services SettingsEventsFeatures: Announcement PlaylistFeatures: Announcement RepositoryFeatures: Auto AttendantFeatures: Call ParkFeatures: Call PickupFeatures: Call QueueFeatures: Call RecordingFeatures: Customer Experience EssentialsFeatures: Hunt GroupFeatures: Operating ModesFeatures: Paging GroupFeatures: Single Number ReachGroupsGuests ManagementHistorical AnalyticsHybrid ClustersHybrid ConnectorsIdentity OrganizationIssuesLicensesLocation Call SettingsLocation Call Settings: Call HandlingLocation Call Settings: SchedulesLocation Call Settings: VoicemailLocationsMeeting ChatsMeeting Closed CaptionsMeeting InviteesMeeting MessagesMeeting ParticipantsMeeting PollsMeeting PreferencesMeeting Q and AMeeting QualitiesMeeting TranscriptsMeetingsMeetings Summary ReportMembershipsMessagesNumbersOrganization ContactsOrganizationsPSTNPartner ManagementPartner Reports/TemplatesPartner TagsPeopleRecording ReportRecordingsReport TemplatesReportsReports: Detailed Call HistoryResource Group MembershipsResource GroupsRolesRoom TabsRoomsSCIM 2 BulkSCIM 2 GroupsSCIM 2 UsersSecurity Audit EventsSend Activation EmailSession TypesSettingsSiteSpace ClassificationsTeam MembershipsTeamsTracking CodesUCM ProfileUser Call SettingsVideo MeshVirtual Line Call SettingsWebhooksWholesale Billing ReportsWholesale ProvisioningWorkspace Call SettingsWorkspace LocationsWorkspace MetricsWorkspace PersonalizationWorkspacesxAPI
API Changelog
SDKs
Space Meetings Migration
Calling
Introduction
Platform
Web
IntroductionQuickstart
Basics
AuthorizationCore ConceptsCalls
Advanced Features
Call SettingsContactsSupplementary ServicesVoicemailBackground Noise Reduction
Kitchen Sink
Meetings
Introduction
Platform
Web
IntroductionQuickstart
Basics
AuthorizationJoin a MeetingMigration To Improved MeetingsPasswords & CaptchasUnified Space Meetings
Advanced Features
Advanced ControlsDialing In and OutStreams & EffectsVideo Resolution
Multistream
Multistream Comprehensive GuideMultistream Quickstart
Migrating SDK V2 to V3
iOSAndroidBrowserNode.jsClick to Call
Developer CommunityCertifications

Browser SDK Messaging Quick Start

Browser SDK Messaging Quick Start

anchorBrowser SDK Messaging Sample App

anchor

This tutorial shows how to use the Webex Browser SDK to do the following:

  • List rooms (spaces) you belong to
  • Create and delete rooms
  • Send a message to a room
  • Add members to a room
  • Listen for newly created or deleted messages in a room

App overview

anchorProject Starter Files

anchor

You can obtain starter and completed project files on GitHub.

  • index.js -- Contains code to initialize the Webex SDK with your personal access token (see Getting your personal access token) and defines a simple logging function.
  • index.html -- Loads the Webex SDK and application code, and provides a basic UI with buttons to invoke various SDK methods. You will create the functions defined for each button's onclick attribute.

anchorGetting your Personal Access Token

anchor

Webex REST API calls require an API access token in the request header. For real-world applications you want to obtain an access token from a user using a Webex Integration and OAuth. For testing purposes however you can use your personal access token available in the Developer Portal.

The Webex JS SDK's init() takes a JSON object that determines how it will authorize API requests

To use your personal access token:

  1. Copy your access token from the form below (you must be signed in to the Developer Portal).

    Log in required for access token.
    Bearer
    This limited-duration personal access token is hidden for your security.
  2. Open index.js and paste your access token for the value of access_token:

    const webex = (window.webex = window.Webex.init({
        credentials: {
            access_token:
            "<YOUR-ACCESS-TOKEN-HERE>",
        },
    }));
    
  3. Save your changes to index.js.

anchorGet a List of Rooms
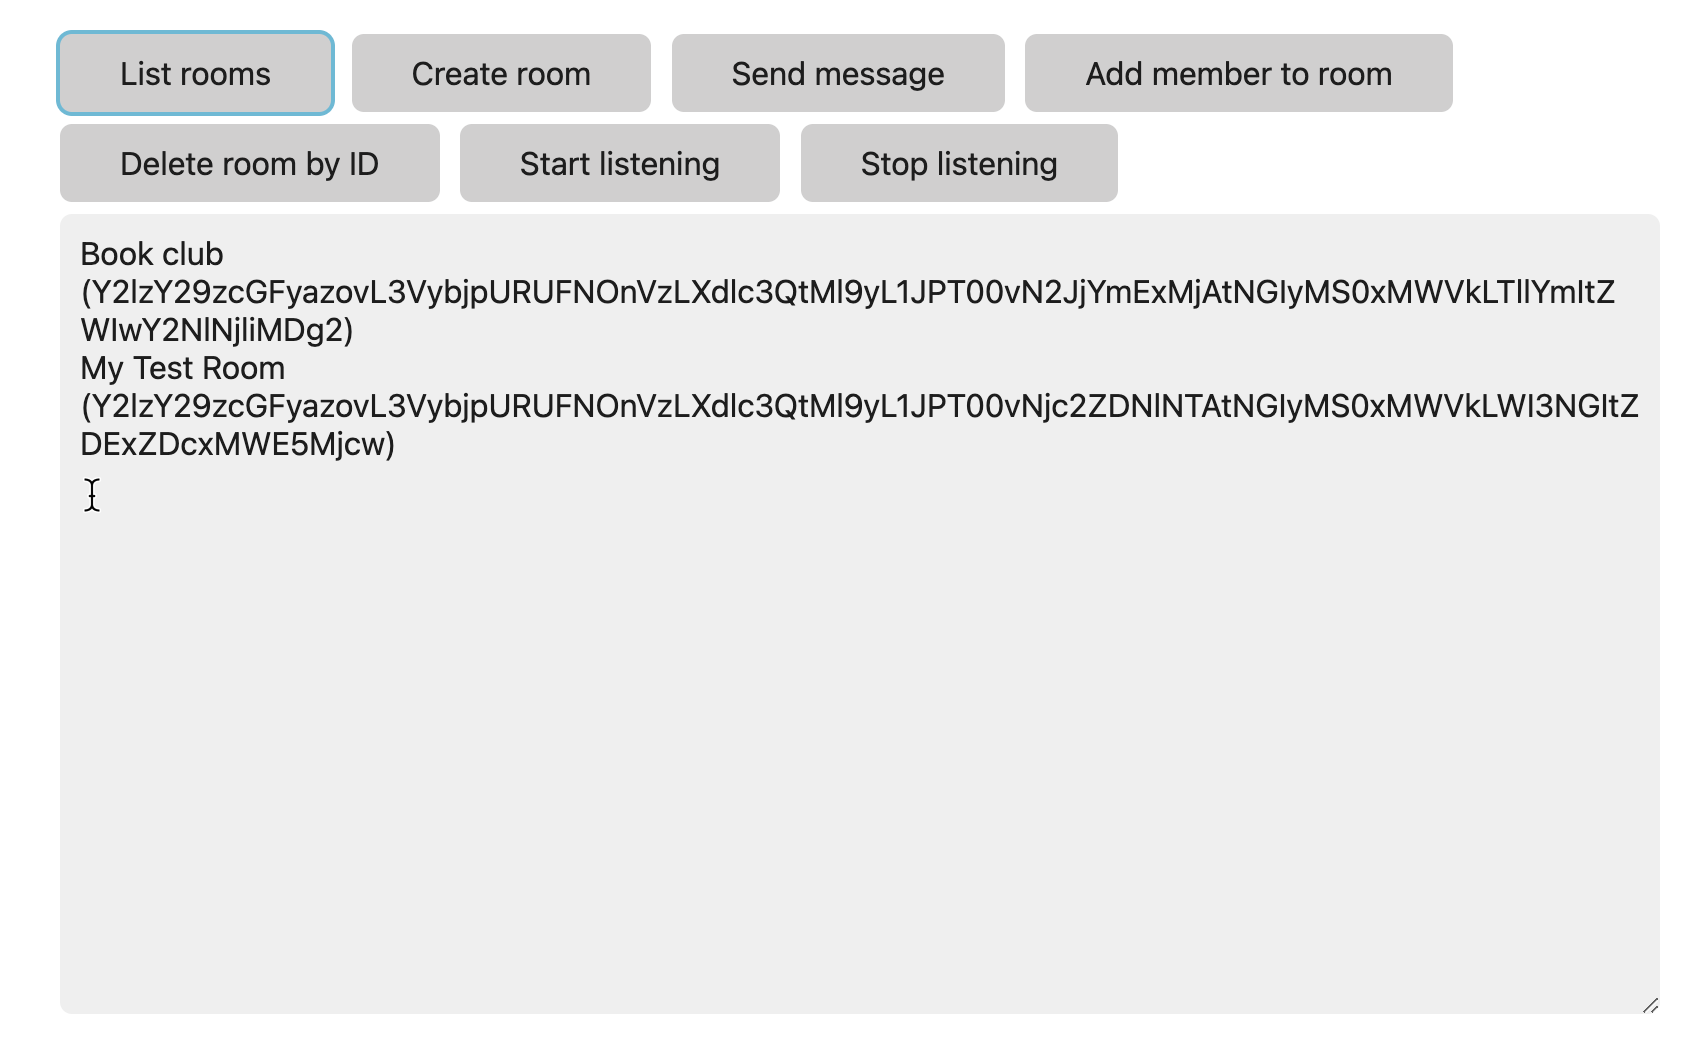
anchor

First you'll use the Browser SDK's webex.rooms.list() method to get a list of rooms you belong to. The code loops over each Room object in the results and displays the title and id property of each object.

  1. Add a listRooms() function to index.js that's called when the user clicks List rooms.

    function listRooms() {
        output.value = "";
        webex.rooms
            .list({ max: 10 })
            .then(function (rooms) {
            if (rooms.items.length == 0) {
                log("There are no rooms to list. Click Create Room.");
            } else {
                for (var i = 0; i < rooms.items.length; i += 1) {
                    log(`${rooms.items[i].title} (${rooms.items[i].id})`);
                }
            }
            }).catch(function (error) {
                log(error);
            });
    }
    
  2. Open index.html in a browser and click List rooms.

    App overview

anchorCreating a Room
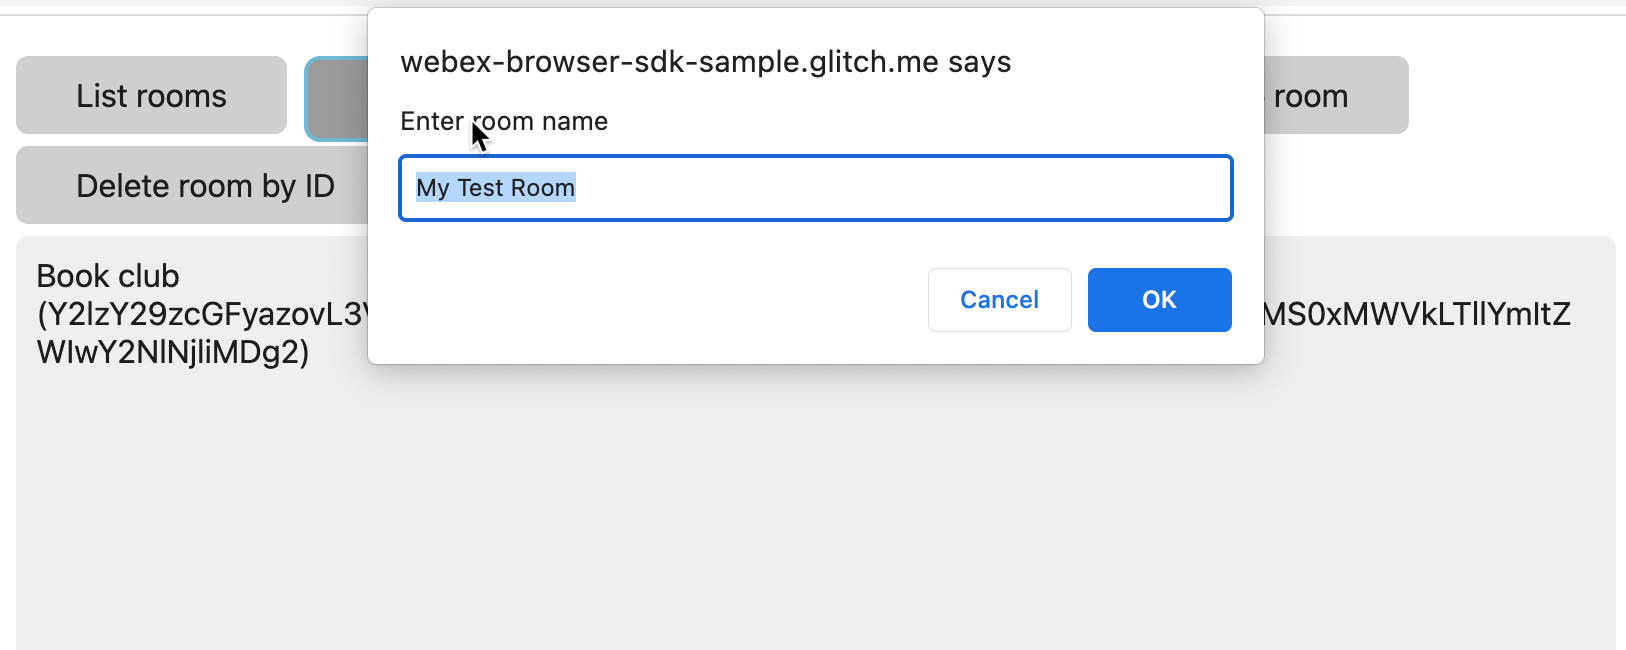
anchor

Next you'll use the webex.rooms.create() method to create a new room (space). The prompt() method is used to get the room name from the user.

  1. Open index.js and add the following code.

    // Variables to hold new room name and ID
    let newRoomName, newRoomId;
    
    function createRoom() {
        // Create the room and save room name and ID
        newRoomName = prompt("Enter room name", "My Test Room");
        if (newRoomName) {
        webex.rooms
            .create({ title: newRoomName })
            .then(function (room) {
                output.value = "";
                newRoomId = room.id;
                log(`Created room: ${room.title} with ID ${room.id}`);
            })
            .catch(function (error) {
                output.value += error + "\n";
            });
        }
    }
    
  2. Save your changes to index.js and reload index.html in your web browser.

  3. Click Create room and enter a room name at the prompt, then click OK.

    New room prompt

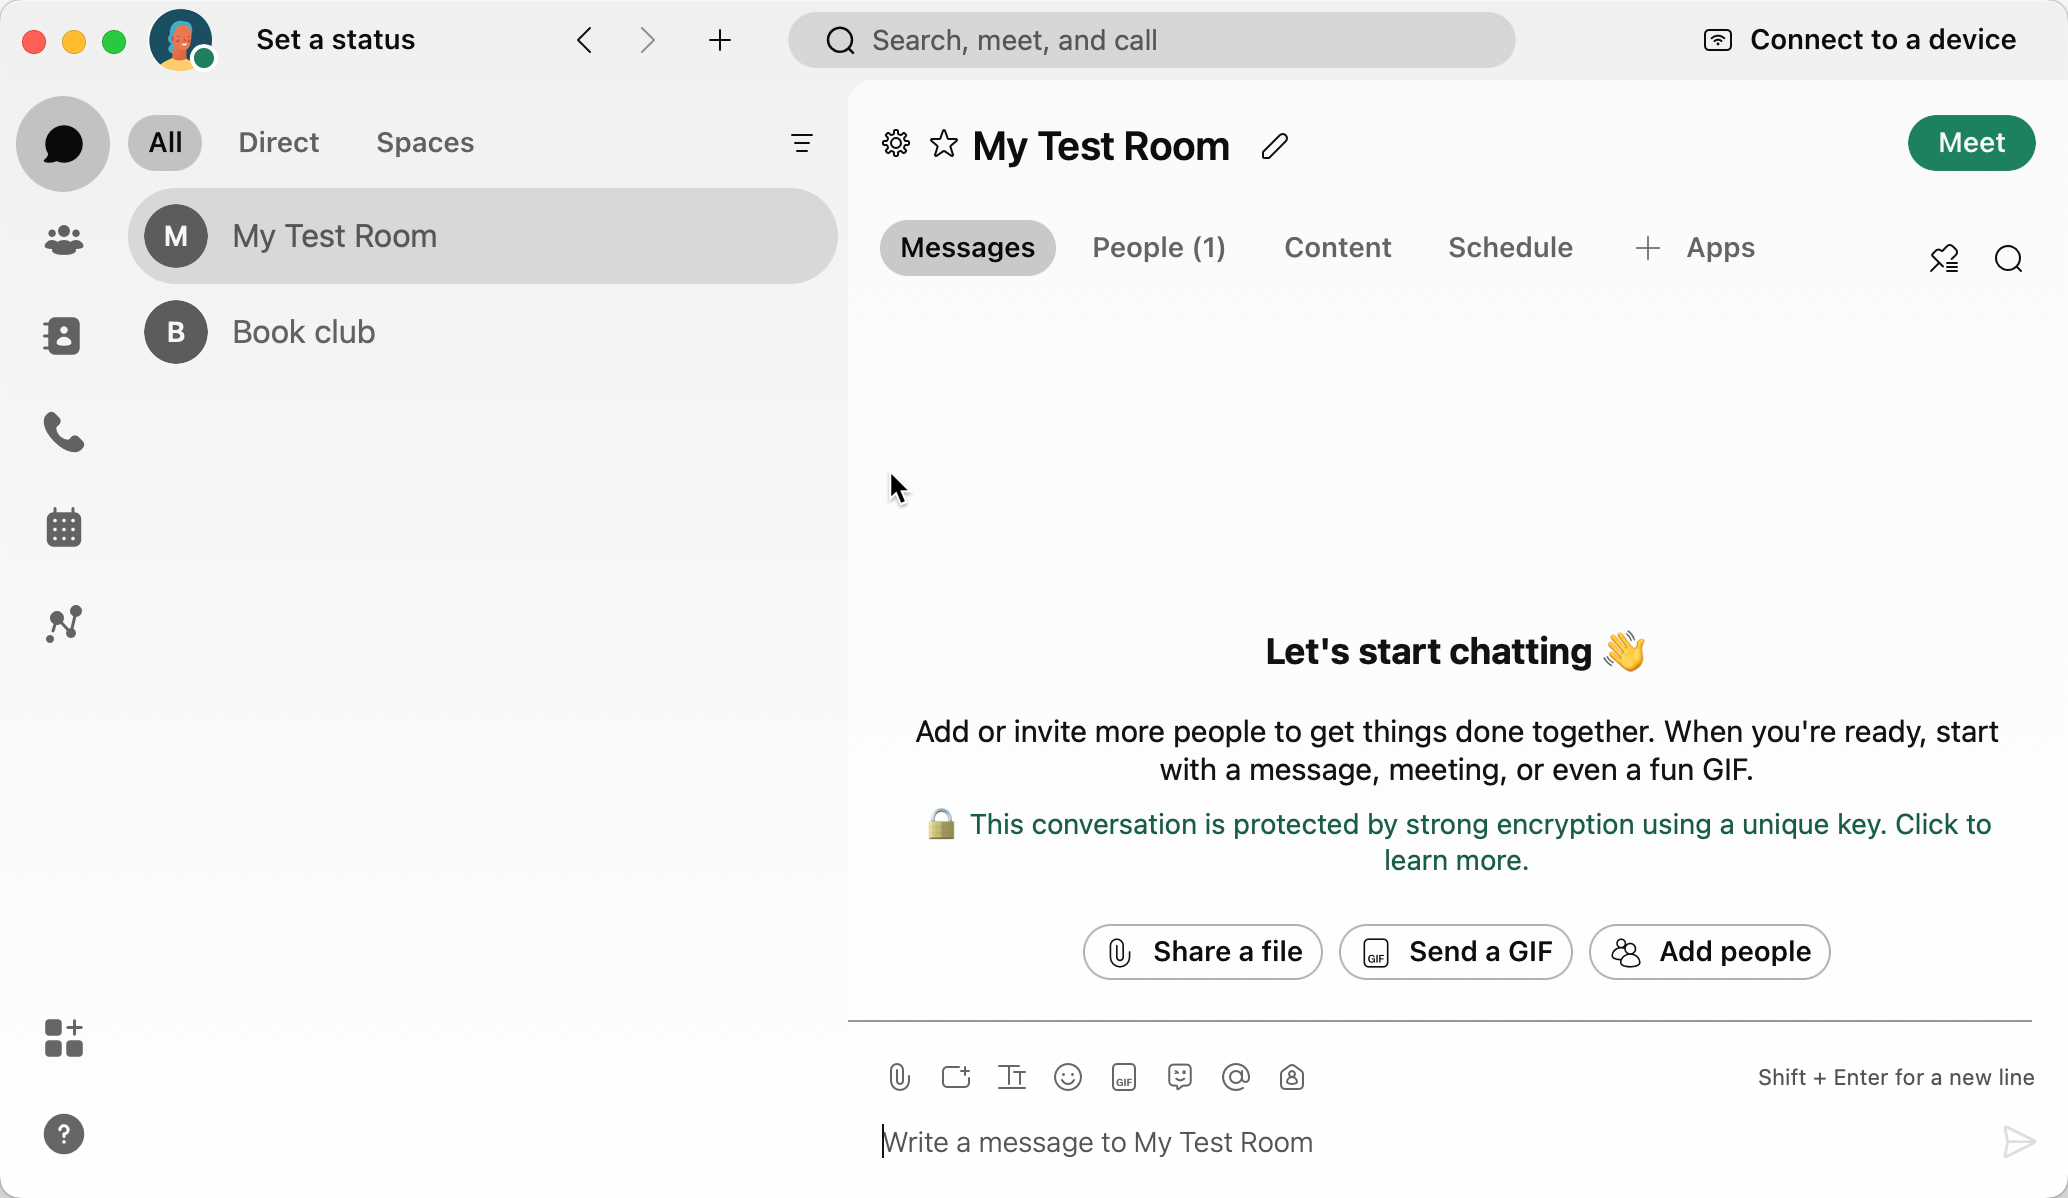
  4. Open your Webex app to see the new room you've created.

    New room in webex

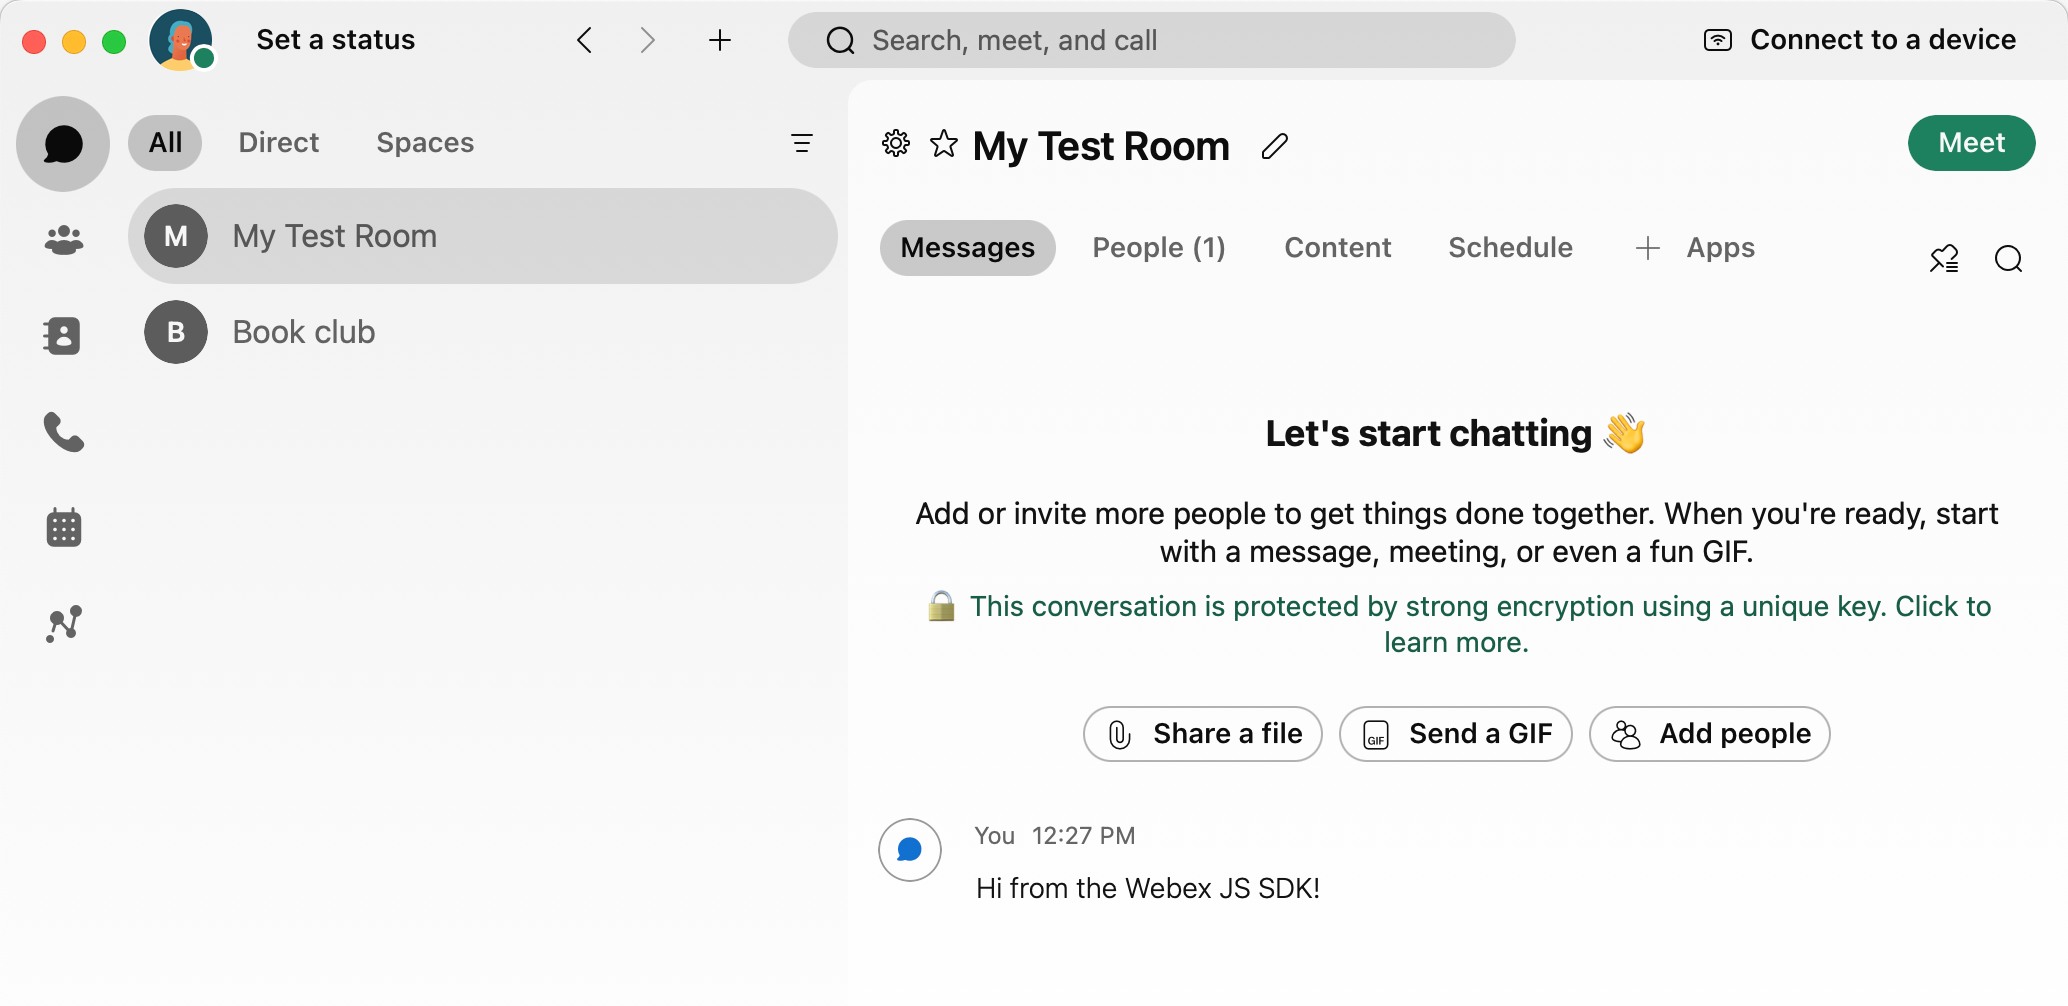
anchorSend a Message to a Room

anchor

In this step you'll add code that sends a message to a room using the webex.messages.create() method.

Steps:

  1. Open index.js and add the following createRoom() function.

    let newRoomName;
    
    function createRoom() {
    // Create the room and set newRoomId to the room's ID
    newRoomName = prompt("Enter room name", "My Test Room");
    if (newRoomName) {
        webex.rooms
        .create({ title: newRoomName })
        .then(function (room) {
            output.value = "";
            newRoomId = room.id;
            log(`Created room: ${room.title} with ID ${room.id}`);
        })
        .catch(function (error) {
            output.value += error + "\n";
        });
    }
    }
    
  2. Save your changes and load index.html in the browser.

  3. Click Send message, enter the message text to send at the prompt, then click OK.

    Open the Webex app to see the message in the newly created room.

    Send message

anchorAdd a User to a Room

anchor

Next, you'll use the webex.memberships.create() method to add a user to a room by their email address. You can use any email address, there doesn't need to be Webex account associated it.

Steps:

  1. Open index.js and create an addMember() function,

    function addMember() {
        let email = prompt("Enter email of user to add", "user@example.com");
        if (newRoomId) {
            webex.memberships
            .create({
                personEmail: email,
                roomId: newRoomId,
            })
            .then(function (membership) {
                log(`${membership.personEmail} added to room`);
            })
            .catch(function (error) {
                log(error);
            });
        } else {
            log("No room ID. Click Create Room");
        }
    }
    
  2. Save your changes and open index.html in a browser.

  3. Click Add member to room, enter an email address at the prompt, then click OK.

    Open the Webex app and see that the user has been added to the room.

    New user added to space

anchorDelete a Room

anchor

you'll use the webex.messages.listen() method to be notified when a message is created or deleted in a room.

  1. Open index.js and add the following function:

    function deleteRoom() {
        let roomId = prompt("Enter ID of room to delete", newRoomId);
        webex.rooms
            .remove(roomId).then(function () {
                output.value = "";
                log("Room deleted");
            }).catch(function (error) {
                log(`Error deleting room ${error}`);
            });
    }
    
  2. Save your changes and reload index.html in your browser.

  3. Click List rooms to get a list of rooms.

  4. Copy the ID of one of the rooms to your clipboard. It should be a room that you created previously with this app.

  5. Click Delete room by ID, paste the room ID into the input text field at the prompt, then click OK.

Open the Webex app to confirm the room was deleted.

anchorListen for New Messages

anchor

Next, you'll use the webex.messages.listen() method to be notified when a message is created or deleted in a room.

Steps:

  1. Open index.js and the following code that defines
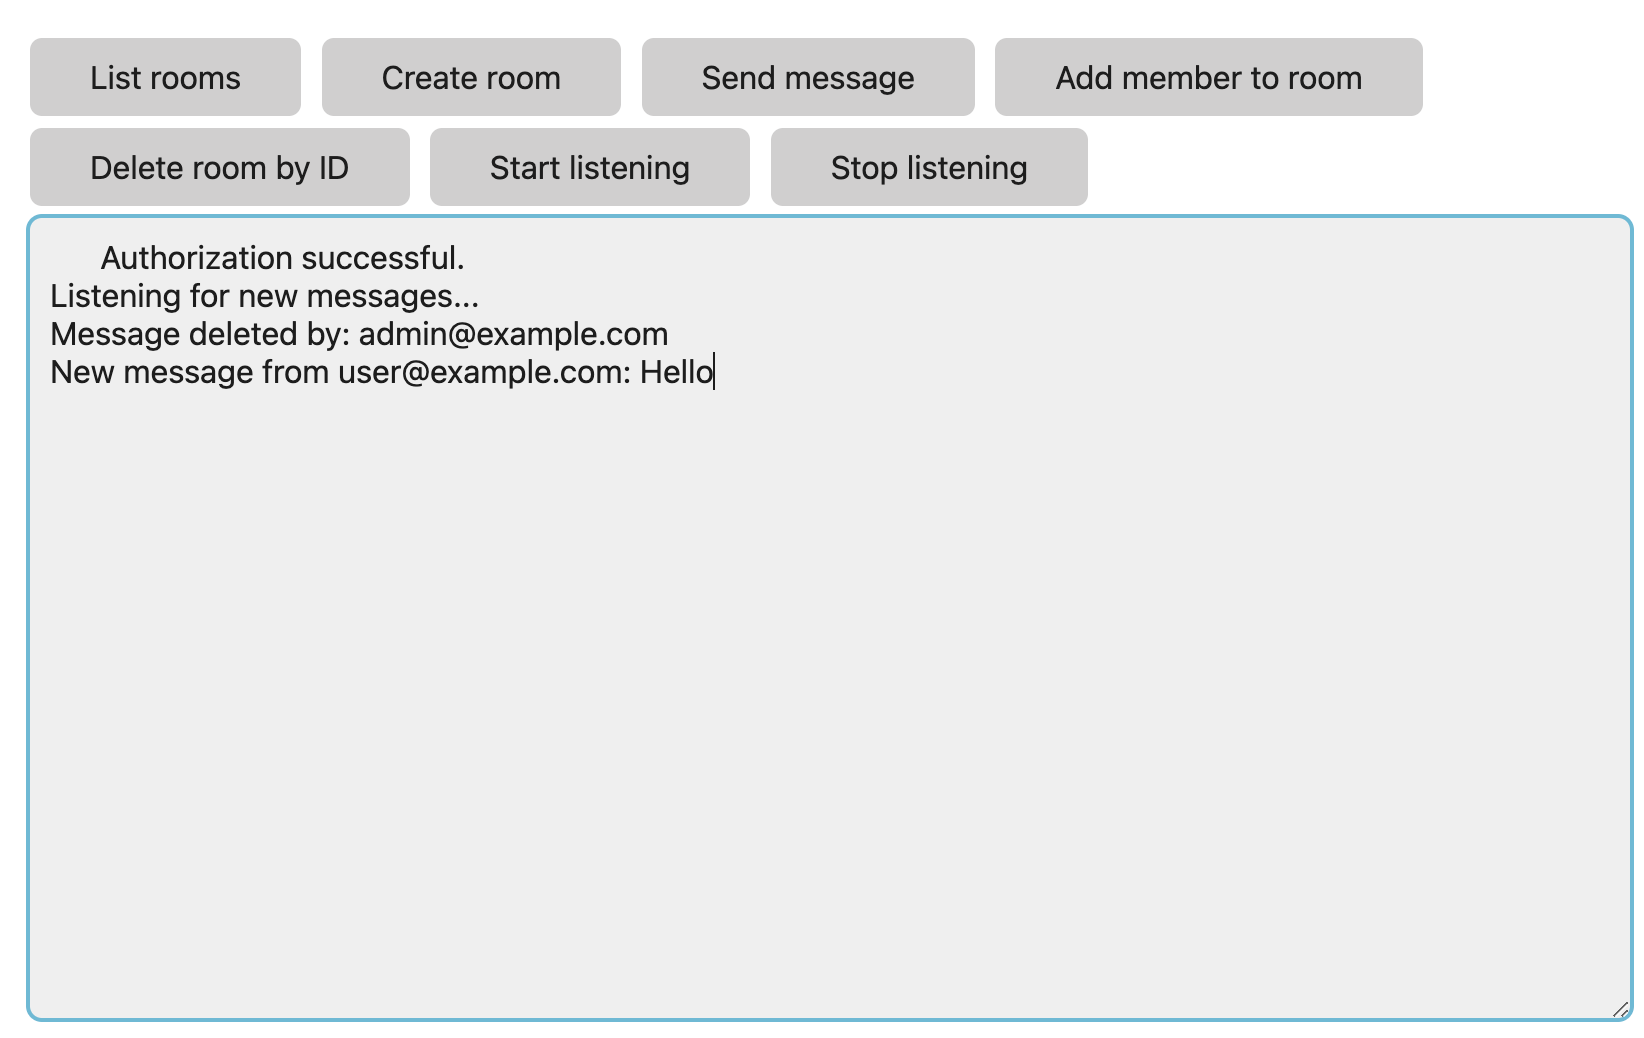
 startListening() and stopListening() methods that are called when the user presses the corresponding buttons. The app listens for created and deleted message events.

    function startListening() {
        webex.messages.listen().then(() => {
            // Listen for newly new message events:
            webex.messages.on('created', (event) => log("New message from " + event.data.personEmail + ": " + event.data.text));
            // Listen for deleted message events:
            webex.messages.on('deleted', (event) => log(`Message delete event: ${JSON.stringify(event)}`));
            log("Listening for new messages...")
        }).catch((e) => console.error(`Unable to register for message events: ${e}`));
    }
    
    function stopListening() {
        webex.messages.stopListening();
        webex.messages.off('created');
        webex.messages.off('deleted');
        log("Stopped listening for new messages.")
    }
    
  2. Save your changes and open index.html in a browser.

  3. Click Start Listening.

  4. Open the Webex app and send a message to any space you belong to, or delete a message. The events are

    Listening for new/deleted messages

In This Article
  • Browser SDK Messaging Sample App
  • Project Starter Files
  • Getting your Personal Access Token
  • Get a List of Rooms
  • Creating a Room
  • Send a Message to a Room
  • Add a User to a Room
  • Delete a Room
  • Listen for New Messages

Connect

Support

Developer Community

Developer Events

Contact Sales

Handy Links

Webex Ambassadors

Webex App Hub

Resources

Open Source Bot Starter Kits

Download Webex

DevNet Learning Labs

Terms of Service

Privacy Policy

Cookie Policy

Trademarks

© 2025 Cisco and/or its affiliates. All rights reserved.